Part 3 of 8 · ← What's in the starter kit?
This page has every step of the blood draw – from warming the arm to the pickup. The step list is deliberately brief enough to print out and keep next to the test kit. The workflow around it – consultation, report, follow-up revenue – is in Your first test – step by step.
Watch it once and you'll know the movement. After that the step list is just for looking things up.
Two notes on the video: it shows a tube from Tasso – you receive tubes from a different manufacturer. The procedure is the same: fill to the topmost mark, then turn the tube ten times top to bottom and back. And the video is edited – in real time a draw takes considerably longer than it appears there. How long is in step 5.
Warm the arm – and drink beforehand. These are the two biggest levers, and both decide between a good draw and a failed one. Rub the upper arm, tap it, or put a heat pack on it – two minutes are enough: a warm arm gives blood, a cold one doesn't. And whoever hasn't drunk enough beforehand gives hardly any blood – a glass of water first is part of the procedure, including when you test yourself.
Disinfect the skin. Spray skin disinfectant (Cutasept F, colourless) onto the upper arm and let it dry for 10 seconds – only then place the Tasso.
Lay out the right tube and attach it to the Tasso so that you can still see the fill marks on the tube. The yellow serum tube for all values except blood sugar, the purple EDTA tube only for long-term blood sugar (HbA1c). For every panel, one tube filled to the topmost mark is enough – no matter what number the admin panel shows.
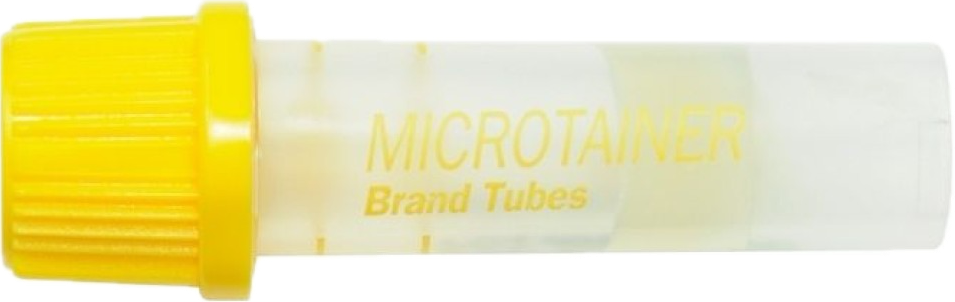
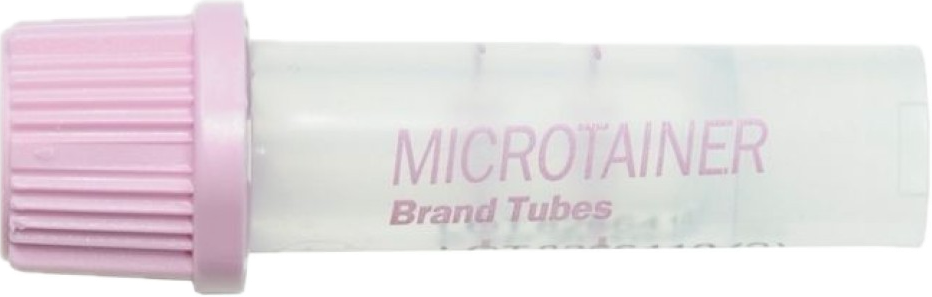
Place the Tasso on the upper arm and press the red button firmly; after the click, keep holding it for three seconds.
Let it run until the tube is filled to the topmost mark – expect three to four minutes, five at most. Three or four minutes are normal and no reason to stop, even though it looks quicker in the video. After five minutes, take it off even if the topmost mark hasn't been reached: the blood clots, waiting longer achieves nothing. How long it takes depends strongly on the warming. If the flow stops midway, a second firm press on the red button can help – sometimes it clears a blockage. To remove it, release the Tasso from the arm starting on one side, with the tube still attached; once removed, the Tasso is used up and must not be placed again.
Pull the tube off carefully with a slight twisting motion, then press the cap down firmly until it clicks audibly. Only then is the tube sealed.
Invert the tube ten times, top to bottom and back. Turn it slowly, as shown in the video – do not shake. Serum and blood not visibly mixing is normal.
The layer at the bottom of the tube must not mix with the blood. It looks like a liquid but it is a solid separation layer – it belongs there and later separates serum from blood cells in the lab. So invert, don't shake, and don't open the tube.
Send the sample in even if it doesn't look nice. Dark, uneven, small clots, less blood than expected – the lab centrifuges the sample anyway, and a result can usually still be obtained from what is there. Throwing it away definitely produces none.
In the admin panel, open Appointments and click the appointment, then enter or scan the barcode and confirm the blood draw. That tells us the sample is ready. We take care of the pickup: every evening we check which samples are ready and have them collected by the next working day at the latest. So you don't have to wait for a courier or announce anything in advance.
Store the sample until pickup – room temperature is perfectly sufficient; it does not need to be refrigerated and keeps overnight without a problem.
Tube into the sample bag, seal the sample bag and put it into the white shipping pouch. Several sample bags may share one pouch.
Pull off the red strip and seal the pouch. The courier brings the return label – you don't need to worry about it.
Nothing needs to be written on the tube or the shipping pouch – no name, no address, no pharmacy name. The match runs exclusively via the barcode.
Something not working? The typical stumbling blocks are listed in FAQ: The most common questions on your first test. Otherwise write to us via the chat in the admin panel – click the chat icon in the bottom right.
Next in the track
Your first test – step by step
From the consultation to the finished report: the full workflow in your pharmacy.